Here’s a description of this process for creating a rubber glove mold having a fiberglass mother mold. I attempted to make it as clear as you can but should you have any questions or suggestions about the way to make it more easy to understand please allow me to know.
Mold making steps for back to back silicon rubber glove mold with fiberglass mother Always make sure you read the company’s product security warnings and tackling directions when using any of these tools or materials discussed in this report.
Be sure the rubber will not adhere to your pattern.
If the pattern you are using is made from a porous material such as plaster or fired clay you need to paint it with a solution of Vaseline and mineral spirits. This alternative will probably work as a release agent. The rubber won’t stick if the pattern is made of moist clay or oil based clay then. No matter how some clay bodies’ composition can contain. If you are not certain the rubber will heal against the clay you’re using you should try it on another sample of the clay or on a small section of your routine. If the rubber does not cure within a day you’ll need to seal the routine before you apply the rubber.
Steps in creating the mold:
1. If the pattern is loose hook it securely to a plywood base. Paint a coat of Vaseline. This will prevent the fiberglass as well as the rubber glove mould and polyester mother mold from sticking to the base. Ready the brush coating. Do this can be a well ventilated area. This coat of rubber is created by mixing DOW 700 clear caulking rubber using an amount of xylol or xylene. For preparing the brush coat, will work. Squeeze an amount of rubber from the caulking tube. Add the xylene until the mixture has the consistency of honey at room temperature and mix. Don’t allow it to form pools. Permit the remedy. This will take about 24 hours.
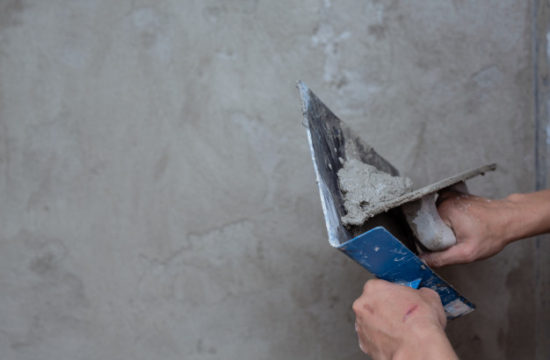
2. It will feel very slightly tacky to the touch, Following the brush coat has cured. Employing a painter’s palette knife apply as equally as possible to the pattern’s surface. Permit this 2nd coating. Work from the areas into the dry areas, so that you don’t include air, pushing the rubber ahead with the rear edge of this blade and leave bubbles. Build a parting line on the patter made from waxed paper cups. These cups must have a waxy coating on the outside or else the rubber will stick to them. Cut the shims to conform to the profile of the pattern along the line where you would like to construct your parting line.
Attach them into the pattern using right pins to both hold them into the routine and to every other. After you’ve constructed the parting line use a paper punch to put holes where you need to place your keys*.
Squeeze a ribbon of rubber from the caulking tube onto the mix of the base of the shims along with the pattern. Do this. Place each of the stops of these keys on one side of the shim and the nipple end of this key through the other side of the shim. Paint Vaseline on the nipple end of these keys along with the exposed regions of the steel pins holding the shims to the pattern. Be sure not to get any Vaseline on the back of the keys.
Next, using a palette knife, spread a layer of rubber over the rear of the shims on the other side; take care to cover the rear of the keys together with rubber because you do this that they will be securely connected to the parting line on that side of the shim. Paint a coat of Vaseline. Next squeeze a layer of rubber on the face of the shim using the nipple protruding. Be certain to cover the nipples thoroughly. Allow to cure 24 hours.
3. Remove. You may need to leave some pins in the edges of the shims to hold them together there. Employ a coating of rubberized with the palette knife. Since you are currently doing this embed a double layer of cheesecloth to the rubber.
This cheesecloth will provide considerably greater tear strength compared to rubber has by itself. Squeeze a bead of rubber onto the pattern then spread it out on the surface with the palette knife. Next place an appropriate shaped and sized bit of cheesecloth then squeeze a bead of rubber onto the top of the cheesecloth. Use the palette knife until it’s entirely involved with the rubber to work the rubber into the cheesecloth. Make sure you push at the cheesecloth into the deepest recesses first and then work out into the areas. Be careful not to create any openings under the rubber’s surface by allowing the cheesecloth to bridge from a high place to another high place. Always push on the cheesecloth into contact with all the coat of rubber. Allow 24 hours to cure.
Whenever you have finished run a bead of rubber around the borders of the shim on either side. This is likely to make the edges of the shim more powerful and more difficult to tear. It is going to produce whenever you make the mother mold a dam which will help contain the edge of the fiberglass and polyester resin.
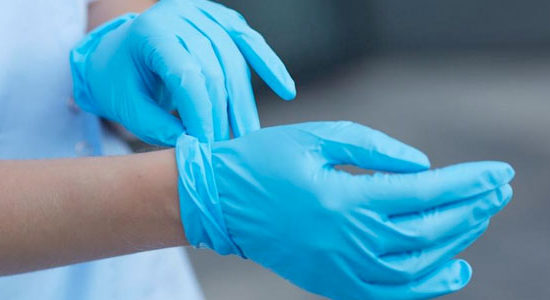
4. Make the coating. This jacket will create a surface that is smooth on the rubber mould that fit back into the mother mould and will separate from. The target is to create as smooth and routine a surface. Squeeze a concentric bead of rubber on the pattern about 3/4″ between passes. Immediately use the palette knife to spread the rubber all. Put on a pair of latex gloves and dip your hands in a solution of detergent and water.
Utilize about 1/4 cup of detergent. Since you smooth the surface of the rubber with your palms this option will prevent the rubber from sticking with your latex gloves. Until it sticks if the rubber begins to stick to your gloves add more detergent. Allow to cure 24 hours.
Make the mother mold. Be sure each side of the mold includes a”clean draft”, which is that there are no deep holes or regions that will create a mechanical lock in the rigid mother mold and keep it from releasing from the routine. You may fix the issue by filling them with clay if there are places on the surface that will make a lock.
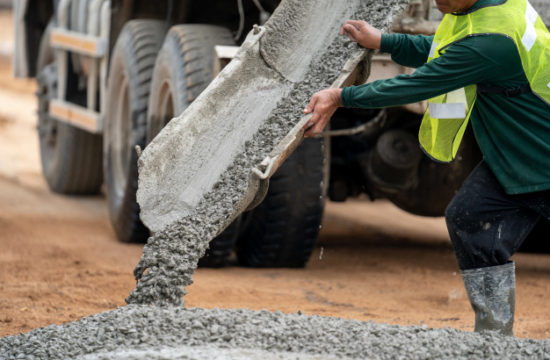
When you’re able to observe the whole surface of the region on which you’ll be making the mother mold from one view point then there will not be any mechanical locks. Cut fiberglass mat to proper sized pieces. Lay out them so they’ll be easy to pick up. In a well ventilated place pour about 4. Of polyester resin bond jacket into a plastic container and then mix 7 to 10 drops per oz (depending on the temperature and humidity) of catalyst to the resin.
Whenever it’s still tacky stick pieces of the fiberglass mat on the surface and paint it down onto the surface of the rubber.
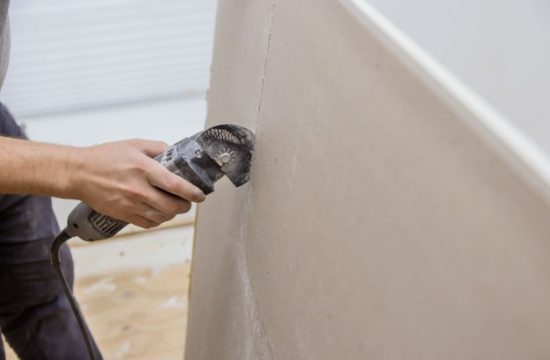
Be sure to operate the mat into the deep regions first and workout to the tops of the higher regions and ridges last. After the resin has cured tough use a side grinder using an abrasive disk to sand any pieces of fiberglass which are protruding from the surface of the mold producing sharp places . Mix up a coat of resin and catalyst and finishing wax and wax it on the surface of the mold. Let me cure 4 or 5 hours. Employing a 5/16″ drill bit drill holes through the rubber and fiberglass shims in enough areas that will insure you’ll have the ability to secure the parts of the mold together after you have eliminated the routine.
5. Separate the mould and eliminate the pattern. Using a putty knife operate the blade in between the fiberglass and the rubber mum mold and force it from the rubber.
Once you’ve removed the mother mold from the rubberized use your side grinder to clean up the outboard edges so that you could handle it without cutting or puncturing your palms. Next push your blade between the 2 sides of this rubber shims and separate them as much as possible along the shim line that is whole. Remove from between the sides of the rubber shim.
By means of a razor blade cut through the 1st and 2nd layers of rubber on which the shims are constructed to the surface of the design. You should gently begin pulling on the rubber When the parting line has been opened up into the surface of the routine. Don’t pull on it away quickly or violently, rather proceed cautiously so as not to tear the rubber from the recesses.
6. When the rubber is from this pattern wash it and place it . Use 1/4″ bolts and wing nuts to secure the 2 sides of the mold together once you reassemble it. The mold is now ready to use.
Making the rubber keys
1. Cut the rubber bead in 1/4″ into 3/8″ extended segments.
2. Press on the caulking gun’s tip against a sheet of paper and make a string of pats or shallow discs of rubberized. Stick on one end of each section into a tap of rubberized while the pat remains wet. This will create a flange on the end of every section which will function as stop on the back of the main when you push on it shims you’ve attached to the blueprint in step 4 above. Permit the keys to cure over night. You can easily make a couple hundred keys.